
To add a new event, click the Create Event button in the top-right corner. A pop-up window will guide you through these steps:
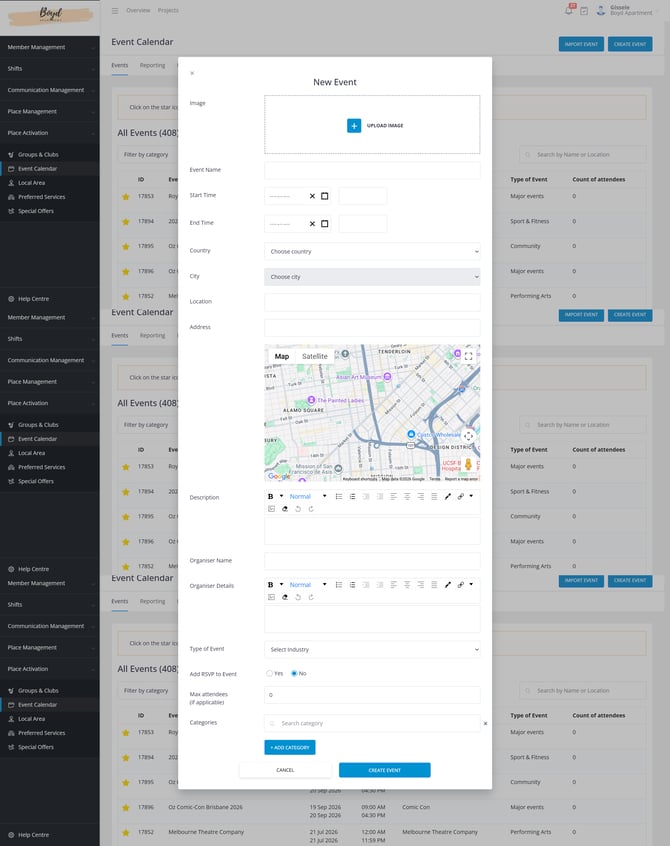
Pro Tip: Use a square image for best display across the home screen and newsfeed.
Pro Tip: Avoid long titles—use the description box for details.
3. Set Day and Time – The event will appear in the app ahead of time and disappear automatically once it’s over.
4. Add Location – Choose country and city from the dropdown, then type the venue name and address.
5. Write a Description – Share event details. There’s no content limit.
Pro Tip: Use bullet points or short paragraphs for readability on mobile devices.
7. Choose Event Type – Select the relevant option from the dropdown.
8. Enable RSVP (Optional) – Allow users to RSVP in the app. You can also set attendee limits.
Pro Tip: For limited spots (like workshops or fitness sessions), always set an RSVP cap to avoid overbooking.
10. Finally, click Create Event.
After posting, open the app on your phone to check how the event looks to users. You can edit the post if needed.